The Honest Guide for Lobes, Cartilage, and Every Piercing in Between
You got your ear pierced, followed the aftercare instructions faithfully, and now you want to know: can you finally take that jewelry out? It is one of the most common questions in piercing, and it has one of the most commonly wrong answers online.
The “six to eight weeks” timeline that gets repeated everywhere is accurate for lobe piercings. For cartilage piercings, it is significantly too short. Changing cartilage jewelry at six weeks is one of the most reliable ways to trigger irritation bumps, set back healing, and extend the whole process by months.
This guide gives you the accurate timelines for every common ear piercing type, the signs that tell you a piercing is genuinely ready, how to change jewelry safely, and what to do when things do not go to plan.
❝ The surface of a piercing heals first. The deeper tissue underneath takes much longer. A piercing that looks healed from the outside is rarely healed all the way through. This is the most important thing to understand about piercing timelines.
Healing Timelines for Every Ear Piercing Type
Different ear piercings heal at very different rates. The key variable is tissue type. Soft lobe tissue has an excellent blood supply and heals relatively quickly. Cartilage has a limited blood supply, heals slowly, and stays reactive to disturbance for a long time after it looks healed.
| Piercing Type | Initial Healing | Full Healing | Earliest Safe Change |
| Earlobe | 6–8 weeks | 3–6 months | 6–8 weeks (lobes only) |
| Upper Lobe | 6–10 weeks | 4–6 months | 8–10 weeks |
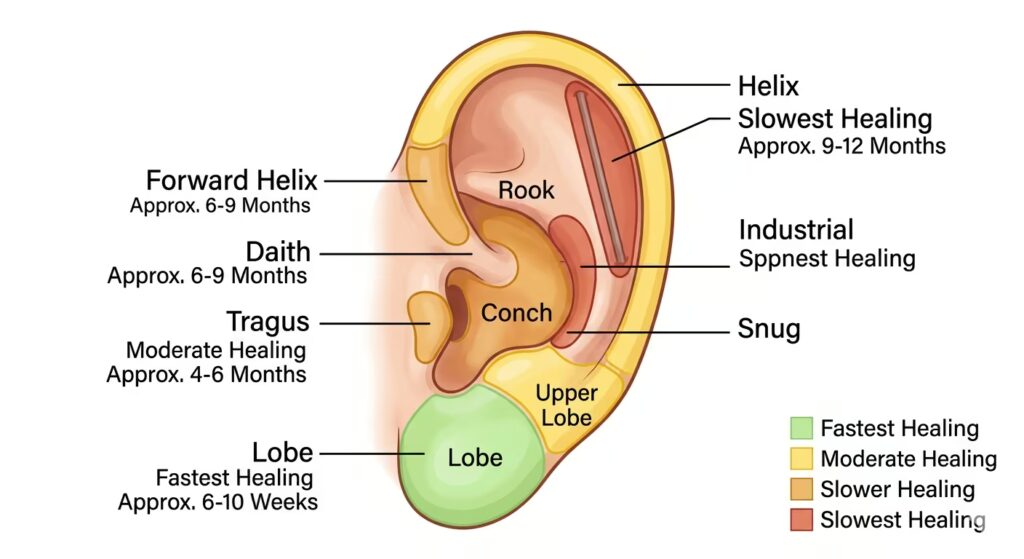
| Helix | 3–4 months | 6–12 months | 6–9 months |
| Forward Helix | 3–5 months | 9–12 months | 9–12 months |
| Tragus | 3–6 months | 6–12 months | 6–9 months |
| Daith | 3–6 months | 6–12 months | 9–12 months |
| Rook | 6–9 months | 12–18 months | 12+ months |
| Conch | 6–9 months | 9–15 months | 9–12 months |
| Industrial | 6–9 months | 12–18 months | 12+ months |
| Snug | 6–9 months | 12–18 months | 12+ months |
The “earliest safe change” column in this table is the minimum, not the target. Waiting until the piercing is fully healed before changing jewelry gives it the best possible foundation. Changing at the earliest safe point increases the risk of irritation and setback.
For a full breakdown of every ear piercing type, including placement and what each one feels like, our guide to ear piercing types and pain levels covers the complete picture.
Why Timelines Vary So Much Between Piercing Types
The difference between a lobe healing in 6 weeks and a rook taking 18 months is not random. It comes down to a few specific biological factors.
Blood supply
Soft tissue, like the earlobe, has abundant blood vessels running through it. Those blood vessels deliver immune cells, nutrients, and oxygen to the body, which use them to build new tissue around the jewelry.
Cartilage has very limited vascularisation. There are far fewer blood vessels running through cartilage tissue. This is why cartilage feels harder and cooler to the touch than the lobe, and it is the primary reason cartilage heals so much more slowly.
Tissue density and thickness
Thicker, denser cartilage structures, such as the rook, conch, and industrial, require the body to build the fistula through a greater volume of tissue. More tissue to heal means more time required, even with good aftercare.
Industrial ear piercing is the most demanding to heal, not just because it involves two piercings, but because both piercings are through cartilage and connected by a single piece of jewelry that runs between them. Every movement of that barbell affects both healing channels simultaneously.
Movement and location
Some cartilage piercings sit in areas that experience more movement and pressure than others. The tragus, for example, sits at the opening of the ear canal. Wearing earbuds, talking on the phone, and sleeping all create contact near a tragus piercing that a high helix simply does not experience.
More movement means greater potential to disturb healing tissue, which consistently correlates with longer healing timelines and a higher incidence of irritation bumps.
The Downsize Appointment: The Change Nobody Talks About
Before you get to the full jewelry change you are excited about, there is usually an intermediate step that most people do not know about until their piercer mentions it: the downsize.
When you are first pierced, the initial jewelry is deliberately slightly longer or larger than your final jewelry. This extra length accommodates swelling during the first weeks of healing. Once the initial swelling has fully settled, usually at six to ten weeks for cartilage piercings, the jewelry needs to be shortened.
A barbell that was the right length for a swollen fresh piercing is too long once swelling is gone. An oversized bar moves more freely within the piercing channel, catches on hair and clothing more easily, and causes consistent low-level trauma to the healing tissue. Getting it downsized to the correct fit is not optional. It is part of the healing process.
❝ The downsize appointment is not the same as a jewelry change. It is a required healing step. Think of it as switching from training wheels to the actual bike — the jewelry style stays the same, just the post length changes.
Budget for the downsizing from day one. It typically costs $10 to $25 for the service at a studio, plus the cost of the shorter post. For cartilage piercings, getting the downsizing done promptly is one of the most impactful things you can do for healing.
How to Tell If Your Piercing Is Actually Ready
Timelines are guidelines, not guarantees. Some piercings heal faster than average, and some take longer. These signs tell you more reliably than a calendar date whether a piercing is genuinely ready for a jewelry change.
Signs a piercing is ready
There is no discharge of any kind, including clear lymph fluid, around the jewelry ends. The skin around the entry and exit points looks the same as the surrounding skin. The jewelry moves freely and smoothly through the piercing channel with no resistance. There is no tenderness to the area when it is gently touched.
The piercing channel feels complete. If you gently press the jewelry from one side, it moves cleanly without the sensation of dragging through incompletely formed tissue. This is easier to feel with experience, which is another reason to have your first change done by your piercer.
Signs a piercing is not ready
Any discharge, even clear fluid, means active healing is still underway. Redness or pink colouring around the entry or exit points indicates ongoing inflammation. Tenderness when touched, even mild tenderness, means the tissue is still sensitive.
If moving the jewelry creates resistance, feels like pulling, or causes discomfort, the fistula is not complete. Forcing a jewelry change at this stage tears tissue and restarts the healing clock.
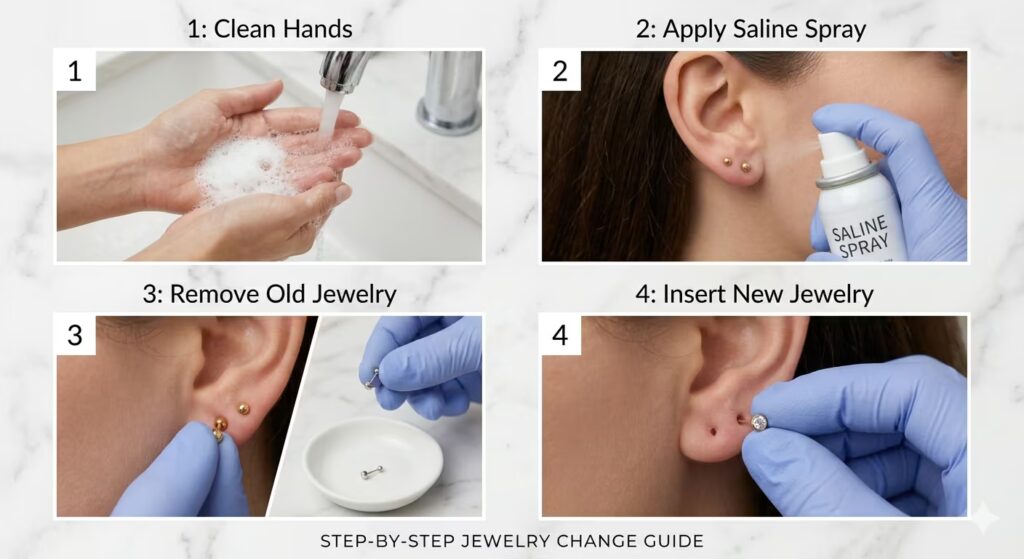
How to Change Your Ear Piercing Safely
Once you are confident the piercing is fully healed, here is how to make the first change safely and without creating unnecessary problems.
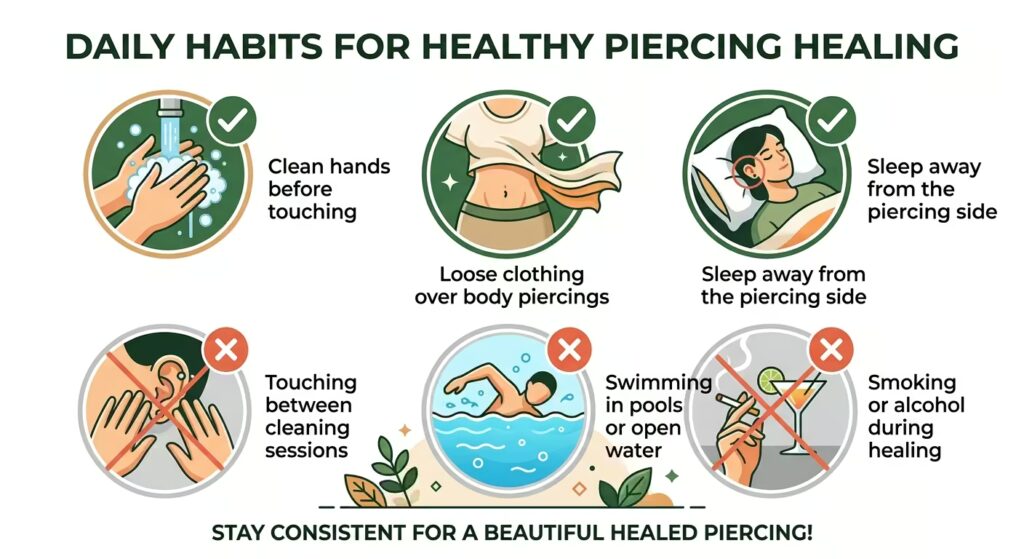
Step 1: Wash your hands
Always. Every time. Without exception. Clean hands are the single most effective barrier against bacterial contamination of your jewelry. Wash with warm water and soap for at least twenty seconds before touching the piercing.
Step 2: Clean the piercing first
Spray the piercing with sterile saline before attempting the change. This softens any dry skin around the entry point and provides a clean surface to work with. For cartilage piercings, especially, doing this step in the shower, where the tissue is warm and relaxed, makes the process significantly easier.
Step 3: Remove the existing jewelry slowly
For a flat-back labret stud, hold the flat back disc steady with one finger inside the ear while unscrewing the top with the other hand. The disc turns counterclockwise to loosen. For a hoop with a hinged closure, gently open the hinge. For a ring with a ball closure, ease the ball out slowly.
Do not force anything. If the jewelry feels stuck or the top will not unscrew, do not apply more force. Visit your piercer. Forcing stuck jewelry risks tearing the fistula or scratching the piercing channel.
Step 4: Insert the new jewelry smoothly
Guide the new jewelry into the piercing channel slowly and without forcing. Well-healed piercings accept jewelry changes easily. If you are feeling significant resistance, the piercing may not be as healed as it appeared.
For internally threaded flat-back studs, insert the post first and then thread on the top. This is the safest insertion method for cartilage piercings because the internally smooth post end does not scrape the inside of the fistula on entry.
Step 5: Clean again
Once the new jewelry is in place, spray the piercing with saline once more. Even on a fully healed piercing, changing jewelry creates minor friction and brief exposure. A quick clean afterward is good practice.
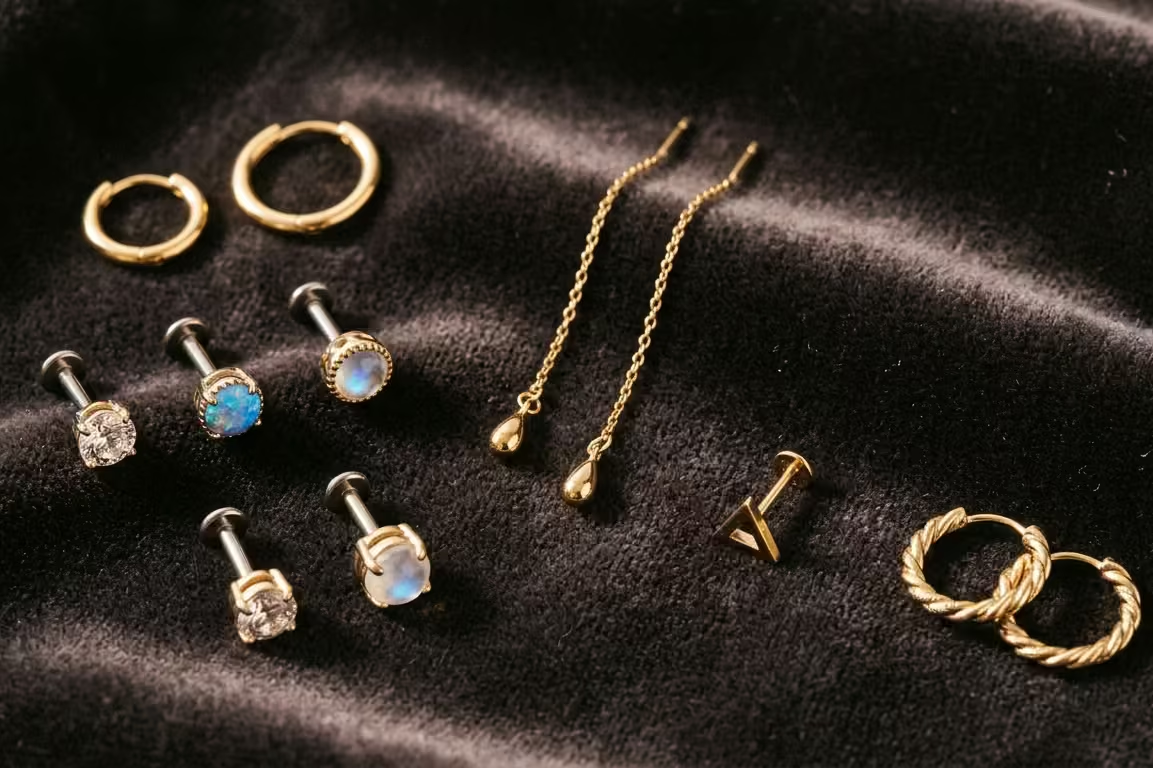
Choosing the Right Jewelry for a Recently Healed Piercing
The first few jewelry changes after a cartilage piercing heal require more care than those for a long-established piercing. The fistula, while fully formed, is still relatively young and can react to significant material changes.
Material matters more for early changes
Stick with implant-grade titanium or solid gold for the first several jewelry changes on a healed cartilage piercing. These materials have the least reactivity and give the young fistula the best environment to continue maturing.
Avoid fashion jewelry brands, mystery metal, and acrylic for cartilage piercings at any stage. These materials cause persistent low-level irritation that keeps the tissue reactive and prevents the fistula from fully maturing even after the initial healing period.
Style transitions for cartilage
If you want to switch from a stud to a hoop in a cartilage piercing, the timing matters. The piercing needs to be fully healed and genuinely settled before introducing a hoop, because hoops create rotational movement that studs do not.
When switching to a hoop, size matters significantly. A hoop that is too large creates too much movement and weight. A well-fitted hoop should sit just close enough to the ear that it does not swing freely with every movement, but it should not put pressure on the piercing site.
| Piercing Type | Best First Change Jewelry | When to Switch Styles |
| Earlobe | Any implant-grade stud, small hoop, or classic earring | After 6 to 8 weeks. Most versatile ear piercing for styles. |
| Helix | Flat-back titanium stud, same style as initial jewelry | After 9 to 12 months. Hoops only after full healing. |
| Tragus | Small flat-back stud in implant-grade titanium | After 9 months. Very small fitted hoops only. |
| Daith | Seamless ring or clicker in implant-grade material | After 12 months. Decorative clickers are popular. |
| Industrial | Straight barbell in the same gauge as the original | After 12 to 18 months. Decorative bars with the same gauge. |
What Happens If You Change Too Early
Changing ear piercing jewelry before it is fully healed is one of the most common piercing mistakes, and the consequences range from minor inconvenience to significant setback. Understanding what actually happens helps explain why the timelines in this guide are what they are.
Irritation bumps
The most common result of a premature jewelry change is an irritation bump, a small raised area that forms around the entry or exit point of the piercing. This is the tissue’s inflammatory response to disturbance. Irritation bumps are not infections. They can usually be resolved by returning to appropriate jewelry and resuming consistent aftercare.
Resolving an irritation bump takes two to four weeks of careful management after the issue is addressed. If you changed too early and triggered one, returning to a flat-back titanium stud in the correct size and restarting your saline routine is the first step.
Delayed healing
Changing jewelry through an incompletely healed fistula disrupts tissue formation. The body has to restart the healing process around the new jewelry. This can add weeks or months to the overall healing timeline.
Infection risk
An incompletely healed piercing channel is more vulnerable to bacterial contamination than a fully healed one. Changing jewelry creates brief exposure and introduces new surfaces into the channel. The combination of both significantly increases the risk of infection in healing piercings.
❝ If you changed your jewelry too early and the piercing is now irritated, do not remove it. Instead, return to a clean implant-grade stud, restart your saline cleaning routine, and give it four to six weeks of undisturbed healing before trying again.
Special Situations
Changing jewelry for sports or swimming
Many people need to remove jewelry for sports or medical procedures before their piercing is fully healed. A clear PTFE or bioplast retainer can be inserted while the standard jewelry is removed. This maintains the piercing channel while presenting a lower-profile piece for the activity.
Return to your regular jewelry as soon as possible afterward, and clean the piercing carefully before and after the retainer insertion. Even with a retainer, minimise the number of times you are handling a healing piercing.
The piercing seems healed, but keeps getting irritated during changes
If a piercing appears fully healed by all visible signs but consistently becomes irritated when you change the jewelry, the most likely explanations are the jewelry material, the jewelry size, or the technique being used for the change.
First, rule out material. Is the new jewelry implant-grade? Second, check sizing. Is the post length and gauge correct for this piercing? Third, consider the technique. Are you changing it in a way that creates minimal trauma? A visit to your piercer to have them assess the situation is usually faster and less frustrating than troubleshooting on your own.
Stretched or enlarged piercing holes
If you notice the hole appears stretched or enlarged after wearing heavy or large earrings, switching to smaller, lighter jewelry for a few weeks usually allows it to contract back to a comfortable size. Significant stretching from regular earring weight over time can be more persistent and may need a professional assessment.
For anyone interested in intentional ear stretching or gauging, that is a dedicated process with its own timeline and approach — quite different from simply wearing heavier earrings.
Frequently Asked Questions
Can I change my earring after 1 week?
No. One week is far too soon for any ear piercing. The fistula has not formed at all at one week. The tissue around the jewelry is still actively managing the initial wound response. Changing jewelry at this stage causes significant trauma and risks infection.
For lobe piercings, wait at least six weeks. For any cartilage piercing, the minimum is several months. See the healing timeline table at the top of this article for specific guidance per piercing type.
Why does my ear piercing smell after changing earrings?
A mild odour from an ear piercing after a jewelry change is caused by a buildup of dead skin cells, sebum, and bacteria on the jewelry and around the piercing channel. This is normal and not a sign of infection.
Clean both the piercing and the new jewelry before each change. Cleaning the piercing channel itself by very gently passing a saline-soaked gauze around the entry point removes buildup. Do this carefully and only on a fully healed piercing.
My piercing closed overnight after removing my earring. What do I do?
Fresh, recently healed piercings can begin to close within hours of jewelry removal. If the piercing has closed to the point where you cannot easily reinsert the jewelry, do not force it. Visit your piercer. They can often open a partially closed piercing safely without a full re-pierce.
If too much time has passed and the channel has fully closed, a re-pierce is necessary. The good news is that re-piercing through an established scar site usually heals faster than the original piercing for most tissue types.
Can I change cartilage jewelry after 3 months?
For most cartilage piercings, three months is too early for a full style change. The downsize from the initial longer post to a correctly fitting shorter post should have happened at six to ten weeks. But switching to a different jewelry style, particularly rings or hoops, should be done only after the piercing is fully healed, at six to twelve months or longer.
If you want to change the style in three months, have your piercer assess the piercing in person. They can tell you far more accurately than a timeline alone whether your piercing is ready for a change.
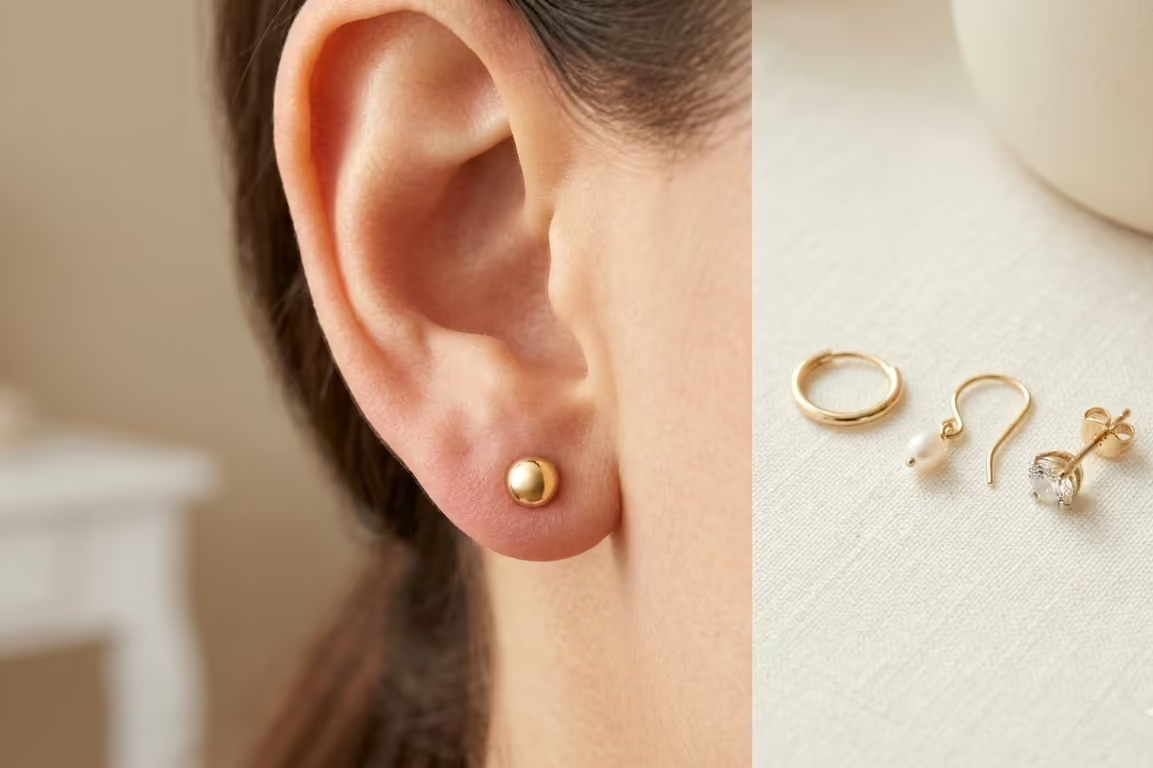
What is the safest first earring to change to?
For lobe piercings, a small implant-grade titanium or solid gold stud, or a small well-fitted gold hoop, is the safest first change. Keep the gauge the same as your original jewelry and avoid anything heavy or dangling for the first few changes.
For cartilage piercings, keep the same style as your initial jewelry for the first change, and focus only on getting the correct post length. Switching to hoops or rings comes after the piercing has had more time to mature.
The Bottom Line: Patience Gets You the Piercing You Want
The most common reason piercing owners end up with prolonged healing, irritation, bumps, or disappointing results is simply changing their jewelry too soon. The timelines in this guide are not arbitrary. They reflect how long different tissue types genuinely take to build a stable fistula that makes jewelry changes safe and easy.
Lobe piercings get to change at six to eight weeks, and that is genuinely great news. Cartilage piercings require months of patience, but that patience is directly rewarded. A fully healed cartilage piercing accepts jewelry changes easily, looks exactly as you imagined, and can be worn comfortably for life.
When you are ready to change, do it properly: clean hands, saline first, slow and gentle technique, implant-grade material. And when in doubt, book five minutes with your piercer rather than guessing. They can answer with far greater accuracy whether your specific piercing is ready than any general guide can.
For more on individual ear piercings and what to expect from each one, see our full guide to types of ear piercings and pain levels. And if you are thinking about adding more piercings to your collection, our article on why people get multiple piercings explores the full picture of curated ear building and beyond.