Everything you need to do — and stop doing — for every piercing type
Getting a piercing is the easy part. A skilled piercer takes seconds to place the needle. The healing that follows takes months.
Aftercare is what determines the outcome. Two people can get identical piercings on the same day from the same piercer and have completely different healing experiences based entirely on how they care for the piercing afterward.
This guide covers everything: what to use, what not to use, the correct technique, how often to clean, what changes between piercing types, and the specific habits that cause most healing problems. All of it is based on current professional piercing standards, not outdated advice.
❝ Most piercing complications are caused by doing too much, not too little. Over-cleaning, rotating the jewellery, and using harsh products are consistently the biggest problems. Simplicity is the foundation of good aftercare.
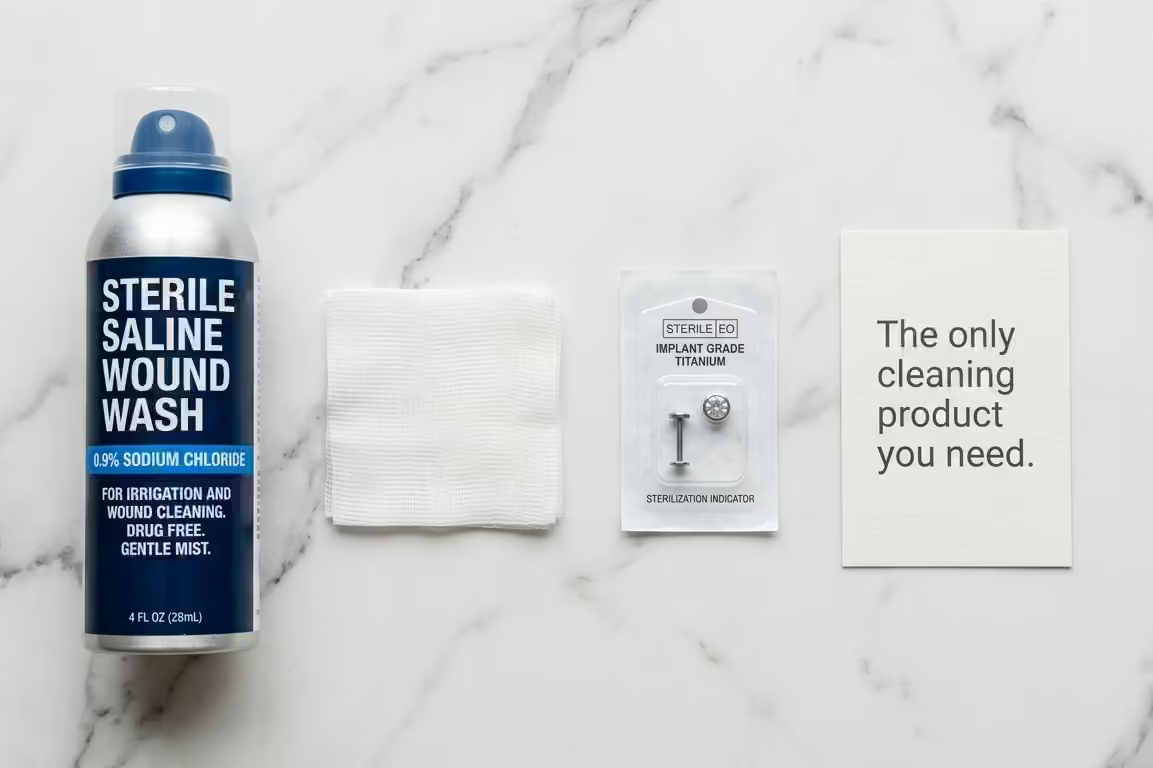
The One Product You Need
Sterile saline wound wash is the only cleaning product you need for a healing piercing.
It is a sterile isotonic solution of 0.9% sodium chloride in water. Nothing else. No preservatives, no additives, no fragrance.
It is available at pharmacies and online under various brand names, including NeilMed Wound Wash, Neilcleanse, and similar products. Look for “sterile saline wound wash” or “sterile isotonic saline” on the label. The sodium chloride concentration should be 0.9%.
Everything else you might consider using — which we cover in detail below — is either unnecessary or actively harmful to healing tissue.
What about a saline nasal spray?
Regular nasal saline sprays are not a sterile wound wash. Many contain preservatives and are formulated for nasal passages, not open wounds.
Some are fine, and some are not. The safest approach is to use a product specifically labelled as a sterile wound wash rather than repurposing a nasal spray.
Can I make my own saline solution?
You can dissolve 1/4 teaspoon of non-iodised sea salt in 8 oz of warm distilled water to make a basic saline rinse.
However, home-made saline is not sterile. The container, the water, and the measuring process all introduce potential contamination. Commercially sterile wound wash is more reliable and less expensive.
If cost is a genuine constraint, home-made saline is better than using harsh products. But sterile wound wash is the professional recommendation.
The Correct Cleaning Technique
Getting the technique right matters as much as choosing the right product.
Step 1: Wash your hands
Always wash your hands with soap and warm water for at least twenty seconds before touching or cleaning a healing piercing.
This is the single most effective step in the entire aftercare process. Clean hands are the primary barrier against bacterial contamination of your piercing.
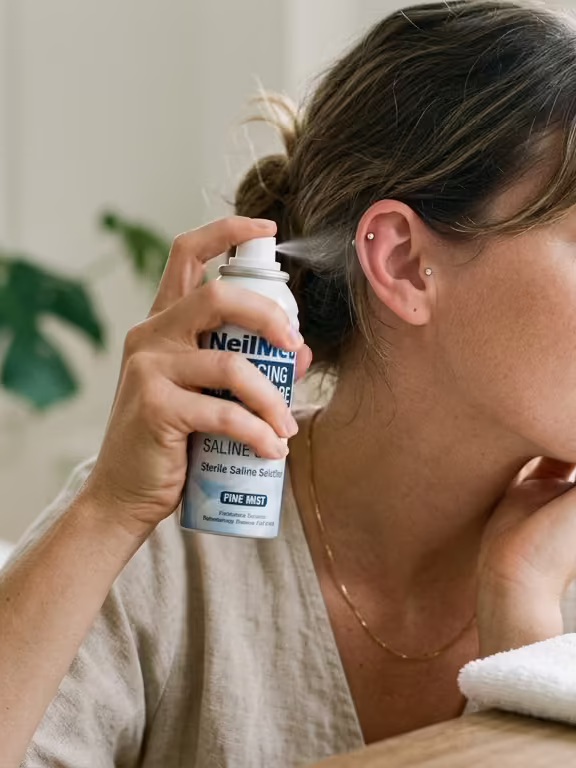
Step 2: Spray the piercing directly
Hold the saline can a few centimetres from the piercing and spray directly onto the entry and exit points.
Let the saline soak the area for thirty seconds. This softens any crust or dried lymph fluid around the jewellery ends without requiring you to touch or scrub the area.
Step 3: Rinse with clean water
Rinse the piercing gently under clean running water in the shower.
This removes the saline and any loosened crust without leaving a residue on the healing tissue.
Step 4: Pat dry gently
Pat the area dry with a clean piece of non-woven gauze or a clean paper towel.
Avoid cloth towels. Fibres from cloth catch on jewellery ends and leave residue near the healing piercing that can cause irritation.
Do not rub. Pat only.
What not to do during cleaning
Do not rotate or move the jewellery. This was standard advice for many years and is now understood to be harmful. Rotating tears the delicate tissue forming around the jewellery and pushes surface bacteria into the healing channel.
Do not pick at or remove crusting with your fingers. Crust around the jewellery ends is dried lymph fluid and is a normal part of healing. It is not an infection. Leave it to soften in the saline and rinse away naturally.
Do not scrub the area. The piercing does not need friction. It needs gentle, consistent, chemical-free cleaning.
❝ The new rule: clean it, rinse it, leave it alone. The old advice to rotate the jewellery daily is the single most damaging habit in piercing aftercare. Stop doing it immediately if you are still doing it.
How Often to Clean
Twice daily is the standard recommendation for all healing piercings.
Morning and evening, ideally in the shower where warm water naturally rinses the area, and the tissue is warm and relaxed.
More than twice daily is not better. Over-cleaning dries out the healing tissue and disrupts the environment in which the fistula is forming. If you are cleaning the piercing more than twice daily because you feel anxious about it, resist the urge. The piercing benefits from being left alone between cleanings far more than it benefits from additional cleaning sessions.
Consistent less-than-once-daily dosing will slow healing. The cleaning removes bacterial accumulation and softens the crust that would otherwise harden and create pressure on the jewellery ends.
Products to Avoid Completely
This section is as important as knowing what to use.
| Product | Why People Use It | Why to Avoid It |
| Alcohol/rubbing alcohol | Kills bacteria | Also kills healing cells. Dries and damages tissue. Significantly delays healing. |
| Hydrogen peroxide | Cleans and bubbles visibly | Destroys the new cells forming the fistula. Prolongs healing significantly. |
| Tea tree oil | Natural antiseptic | Too harsh for healing tissue. Causes contact dermatitis and persistent irritation. |
| Antibacterial soap (near piercing) | General cleaning habit | Residue left near the piercing causes irritation. Use on hands only. |
| Betadine/iodine | Strong antiseptic | Far too harsh. Cytotoxic to healing cells. Never appropriate for piercings. |
| Bactine | Marketed for wounds | Contains benzalkonium chloride, which irritates healing piercing tissue. |
| Emu oil | Alternative healing aid | No evidence of benefit. Introduces unnecessary substances to healing tissue. |
| Cotton wool | Soft cleaning material | Fibres catch on jewellery ends and leave residue inside the piercing site. |
The consistent theme across all of these is that they are either too harsh for healing tissue or they leave residue that causes irritation. Healing tissue is not the same as intact skin. It is significantly more vulnerable to chemical damage.

Aftercare by Piercing Type
The core cleaning routine is the same for every piercing. What changes are the specific daily habits that protect different placements during healing.
Ear piercings: lobe
Clean twice daily with sterile saline. The main habit to build is avoiding sleeping on the pierced ear during the six to eight-week healing period.
Hair products, shampoo, and conditioner running over the piercing during washing are fine as long as you rinse thoroughly. The brief contact during a shower is not a problem.
Avoid swimming in pools and open water for the first four weeks. Chlorinated water and natural bacteria in open water can enter the healing channel.
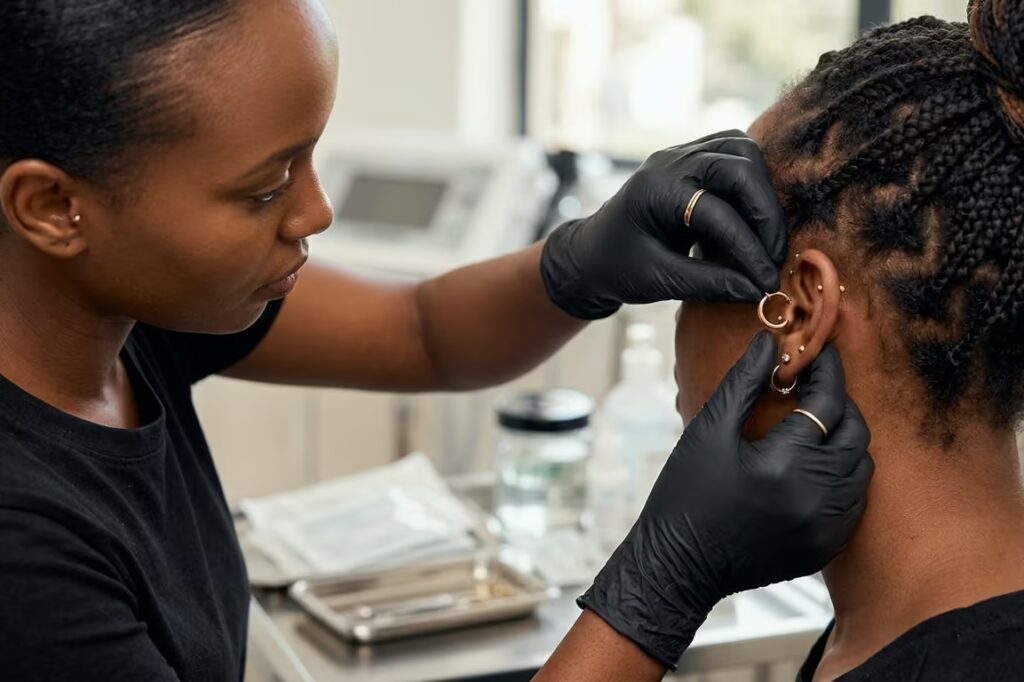
Ear piercings: cartilage (helix, tragus, daith, rook, conch, industrial)
The same twice-daily saline routine applies. The critical additional factor for cartilage is sleeping position.
Cartilage heals significantly more slowly than the lobe — six to twelve months for most placements, up to eighteen months for the rook and industrial. Sleeping on healing cartilage for hours every night is one of the most reliable causes of irritation, bumps, and prolonged healing.
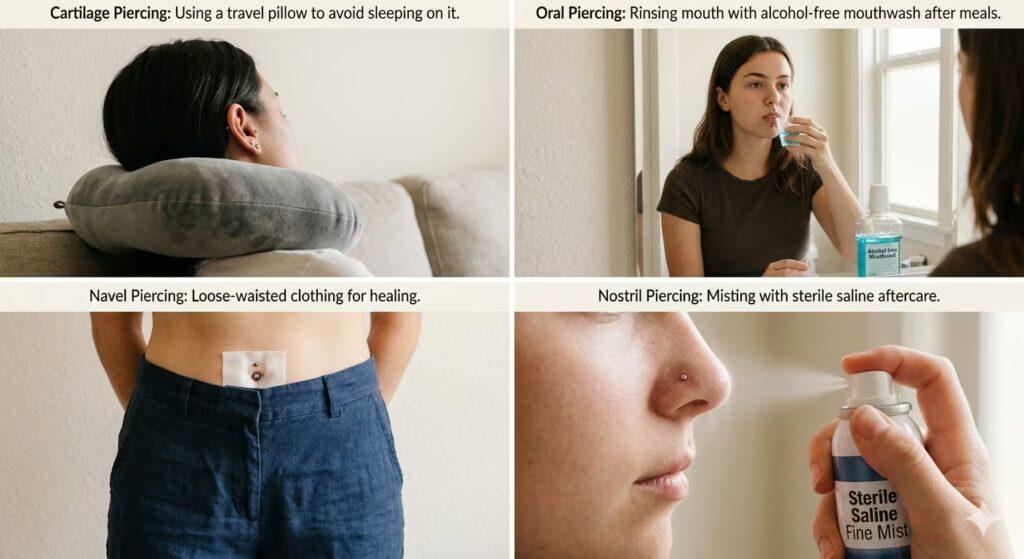
A travel pillow worn around the neck during sleep keeps the head from rolling onto the pierced ear. It takes adjustment, but the difference in healing outcomes is significant.
Over-ear headphones that press against the piercing should be avoided during the healing process. For tragus piercings specifically, in-ear earbuds should also be avoided for the first three to four months.
For complete guides to individual cartilage piercings, see our articles on helix piercing and tragus piercing benefits and care.
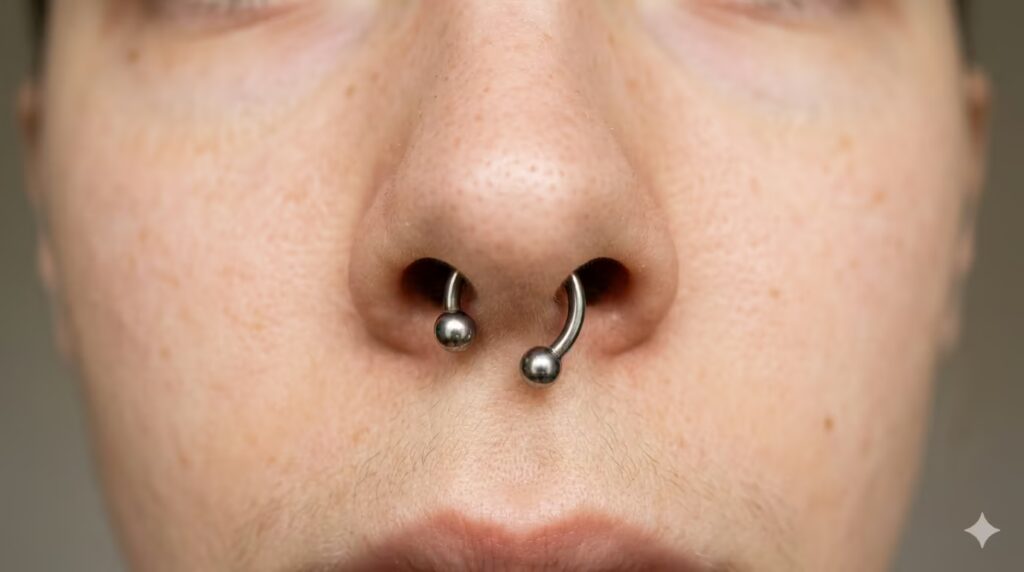
Nose piercings: nostril and septum
Standard external cleaning twice daily with sterile saline.
Avoid blowing your nose forcefully during the first few weeks. Gentle blowing is fine. Clean the piercing after blowing your nose.
Keep makeup, foundation, and skincare products away from the piercing site during the healing process. These products are formulated for intact skin, not healing tissue.
For septum piercings, avoid flipping the jewellery up and down repeatedly during healing. Flip it up for work or occasions where you need it hidden, then leave it in that position rather than toggling it constantly.
Lip and facial piercings
Facial piercings with labret studs, such as the Medusa and labret, require both external and internal cleaning.
External: spray with sterile saline twice daily, as with all piercings.
Internal: Rinse with alcohol-free mouthwash after every meal. This removes food particles from around the interior disc before they create irritation against healing tissue. Use alcohol-free mouthwash specifically. Alcohol-based mouthwash is too harsh for healing oral tissue.
Soft foods in the first two weeks significantly reduce trauma to healing lip tissue. Avoid spicy, acidic, and very hot foods during the early healing phase.
For the complete guide to lip piercing aftercare by type, see our article on different types of lip piercings.
Tongue piercings
The tongue heals quickly, but the first week is challenging. Significant swelling makes speaking and eating difficult for three to five days.
Rinse with alcohol-free mouthwash after every meal and every drink other than plain water throughout the healing period.
Cold food and drinks reduce swelling in the first week. Ice chips, cold water, and cold soft foods all help manage the initial inflammation.
Avoid alcohol, smoking, and kissing during healing. All three introduce bacteria and significantly slow healing.
Body piercings: navel, nipple, surface
Standard twice-daily saline cleaning. The main challenge for body piercings is clothing contact.
Belly button piercings sit exactly where waistbands, jeans, and tight clothing create friction. Loose, low-waisted clothing during healing significantly reduces this. A small piece of non-woven gauze taped over the piercing under clothing provides a physical barrier during sport or activities where waistband contact is unavoidable.
Nipple piercings need protection from snagging on clothing, particularly during sleep and exercise. A soft, non-abrasive fabric bra or a breathable dressing over the piercing during sport reduces accidental contact.
For the full navel and nipple piercing guides, see our articles on how much a belly button piercing costs and how much nipple piercings cost.
The Downsize Appointment: Essential, Not Optional
Most people know about aftercare cleaning. Far fewer know about the downsize.
When you are first pierced, the jewellery is deliberately slightly longer or larger than your final piece. This extra length accommodates swelling during the first weeks of healing.
Once initial swelling has fully settled, typically at six to eight weeks, that extra length becomes a problem. A post that was correct for a swollen fresh piercing is too long for the settled tissue. It moves around inside the piercing channel more than it should, catches on hair and clothing, and creates continuous low-level trauma to the healing tissue.
At six to eight weeks, return to your piercer for a downsize. They replace the longer initial post with a correctly fitting shorter one. This single appointment is one of the most impactful things you can do for your healing outcome.
Budget for it from the start. It typically costs $10 to $25 at a studio. For everything about when each piercing type is ready for a change, see our complete guide to when to change an ear piercing.
❝ The downsize appointment is not the same as a jewellery change. It is a required healing step. A post that is too long is one of the most overlooked causes of prolonged healing and irritation bumps.
Healing Timeline by Piercing Type
| Piercing Type | Full Healing Time | Key Aftercare Note |
| Earlobe | 6–8 weeks | Fastest healing. Avoid sleeping on it. Manage hair product contact. |
| Nostril | 4–6 months | Avoid forceful nose-blowing. Keep makeup away from the site. |
| Septum | 3–6 months | Limit flip-up toggling during healing. Saline twice daily. |
| Helix | 6–12 months | Sleep position critical. Hair management. Downsize at 6–8 weeks. |
| Forward Helix | 9–12 months | Denser cartilage. Longer patience required. Same core routine. |
| Tragus | 6–12 months | No earbuds for 3–4 months. Phone on non-pierced side. |
| Daith | 6–12 months | The inner fold is harder to clean. Use a spray rather than soaking. |
| Rook | 12–18 months | One of the slowest-healing cartilage piercings. Maximum patience. |
| Industrial | 12–18 months | Both holes heal together. Bar movement affects both channels. |
| Tongue | 4–8 weeks | Fast healing. Mouthwash after every meal. Cold food first week. |
| Labret / Medusa | 3–6 months | Dual routine: saline externally, mouthwash internally. |
| Belly button | 6–12 months | Clothing friction is the main challenge. Loose waistbands. |
| Nipple | 9–12 months | Protect from snagging. Soft fabric against the piercing site. |
Daily Habits That Affect Healing
Aftercare is not only what you do at the sink twice a day. The habits that carry over into the rest of your day have as much impact on healing as the cleaning routine itself.
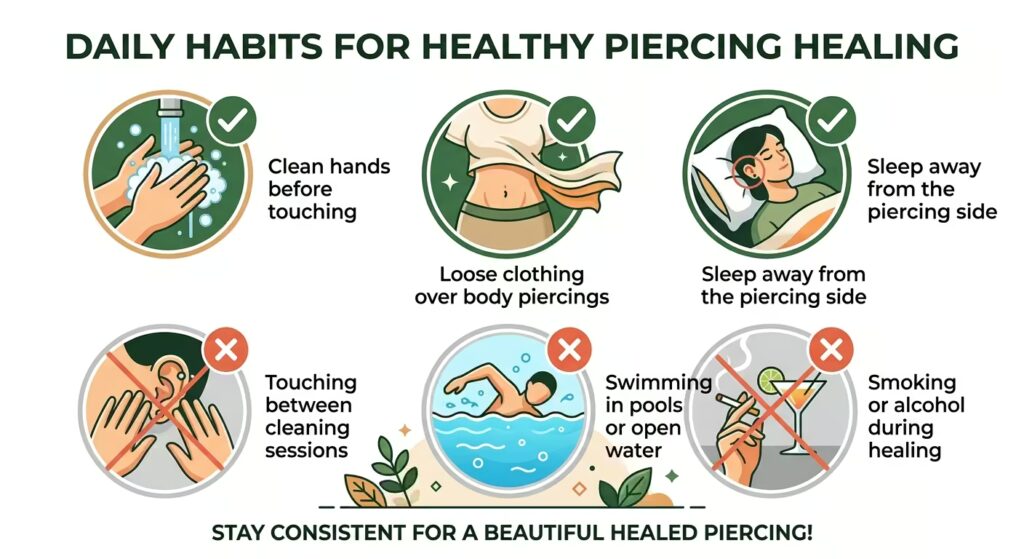
Hands off
The most damaging thing most people do to a healing piercing is touch it between cleaning sessions.
Every unnecessary touch introduces bacteria and creates mechanical disturbance to the forming fistula. The only time hands should be near the piercing is during the twice-daily cleaning, and only after washing.
Clothing choices
For body piercings, clothing that does not come into contact with the piercing site is one of the most practical lifestyle adjustments you can make during healing.
Loose waistbands for navel piercings. Soft, non-abrasive fabrics over nipple piercings. Clothing that does not catch on the belly button jewellery when sitting or bending.
Swimming
Avoid pools, hot tubs, and open water for the first two to three months of any piercing.
Chlorinated water and natural water both carry bacteria that can enter the healing channel. Hot tubs are particularly high-risk environments due to the warm water temperature and higher bacterial load.
If swimming is unavoidable, a small waterproof adhesive dressing over the piercing provides some protection. Clean the piercing thoroughly with sterile saline immediately after.
Alcohol and smoking
Alcohol thins the blood and slows the immune response. Smoking reduces blood circulation and tissue oxygenation. Both significantly extend healing timelines for any piercing.
For oral piercings — tongue, lip, and labret styles — alcohol and smoking also introduce direct chemical irritation to the healing tissue through the mouth.
Stress and sleep
The immune system does most of its healing work during sleep. Consistent sleep deprivation measurably slows wound healing.
Significant physical or emotional stress also diverts immune resources away from healing. These are factors within your control, and they are genuinely relevant to piercing healing outcomes.
Signs of Normal Healing vs. Signs of a Problem
Understanding what is normal prevents unnecessary panic. And recognising genuine warning signs prevents delays in getting appropriate help.
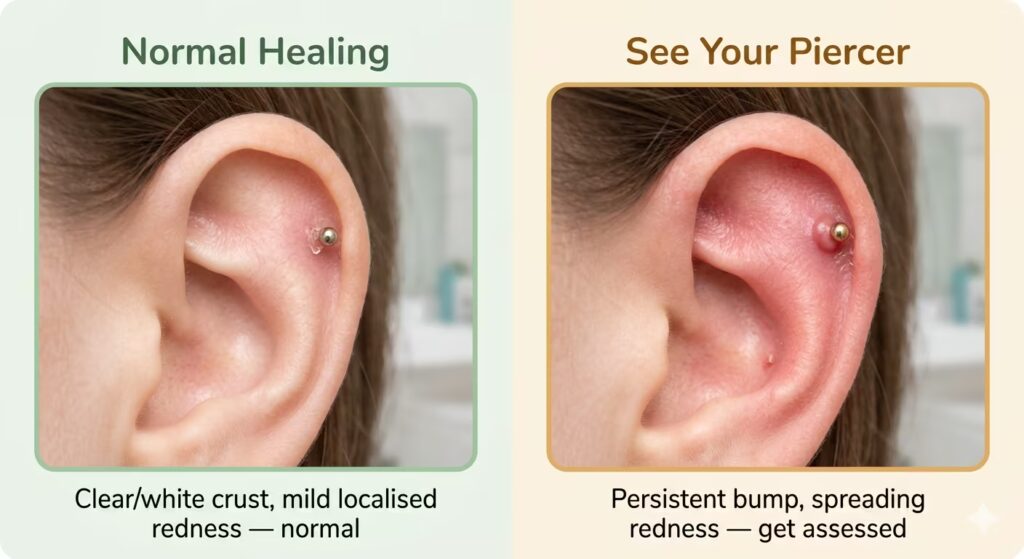
Normal healing signs
Clear or whitish discharge that dries to a crust around the jewellery ends is lymph fluid. It is a normal part of healing and not a sign of infection.
Mild redness and swelling immediately around the entry and exit points in the first few weeks is a normal inflammatory response.
Occasional tenderness when accidentally touched or bumped is normal throughout the cartilage healing period.
The jewellery feels slightly different in different positions on different days, which is normal as the tissue swells and settles in cycles during healing.
Signs that need attention
Spreading redness that moves outward from the piercing site rather than staying localised around the jewellery ends is a warning sign.
Significant swelling, throbbing pain, warmth in the tissue around the piercing, and yellow or green discharge indicate possible infection rather than normal healing.
A persistent lump that has been present for more than six weeks and has not changed in response to improved aftercare is worth having assessed by your piercer.
For a detailed breakdown of the difference between irritation and infection, see our dedicated guide to piercing infection vs. irritation: how to tell the difference.
Frequently Asked Questions
Can I clean my piercing more than twice a day if it looks dirty?
No. Additional cleaning sessions do not produce better outcomes and can dry out and irritate healing tissue.
If crust is building up between cleaning sessions, make sure you are rinsing thoroughly in the shower. A longer rinse dissolves crust without requiring additional cleaning sessions.
What if I miss a cleaning session?
Occasionally, missing one session is not a crisis. Resume your routine at the next session and do not attempt to compensate by cleaning twice in quick succession.
Consistency over weeks and months matters far more than perfection on any single day.
My piercing is itchy. Is that normal?
Itching during healing can be normal. It is often a sign of tissue healing.
However, persistent itching, redness, swelling, or discharge can also indicate a metal sensitivity reaction to the jewellery material. If itching is combined with any of those other signs, consider whether the jewellery material is the issue and visit your piercer.
Can I use Sudocrem or other healing creams?
No. Creams, ointments, and balms are not appropriate for healing piercings.
They create a moisture-trapping environment around the jewellery, encouraging bacterial growth. They also block the natural air circulation that the healing tissue needs. Sterile saline alone is the correct approach.
How do I know when my piercing is fully healed?
A fully healed piercing has no discharge of any kind at any point in the day. The jewellery moves freely through the channel with no resistance or pulling sensation. There is no tenderness on touch.
The appearance of the skin around the entry and exit points is the same as that of the surrounding unaffected skin. Surface healing happening first does not mean full healing.
For specific healing timelines for each piercing type, see our guide on when to change an ear piercing, which provides a full breakdown.
Should I take out the jewellery if I think there is a problem?
In most cases, no. Removing jewellery from an infected or irritated piercing traps the problem inside the closing channel, which can make things significantly worse.
Visit your piercer for an assessment before removing jewellery. If the issue is an infection that requires medical treatment, your doctor can advise whether removal is necessary. Do not make that decision alone.
Keep It Simple, Keep It Consistent
The best aftercare routine is the simplest one done consistently.
Sterile saline, twice a day, clean hands, leave it alone in between. That is genuinely it for the cleaning part. The rest of aftercare is lifestyle: sleep position, clothing choices, avoiding pools, and keeping hands off.
Most healing problems come from adding things that should not be added — harsh products, unnecessary touching, premature jewellery changes — rather than from not doing enough. Trust the process, keep the routine simple, and let the tissue do what it is designed to do.
For guidance on what your specific piercing involves beyond aftercare — pain levels, costs, jewellery, and what to expect — explore the individual piercing guides throughout piercenow.com. A good start is our overview of body piercing types with pictures, which covers every major placement.